See for more themes.
 |
Q1: Welcome to Amish Style Gardening. As a result of watching Amish gardening Videos on U-Tube, my gardening skills have reverted to kindergarden levels. I begin a radically different approach to gardening: Index: Curing and harvesting potatoes
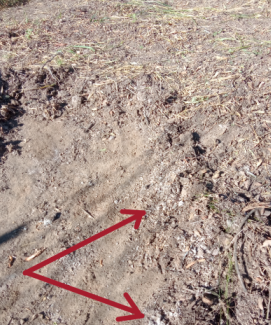
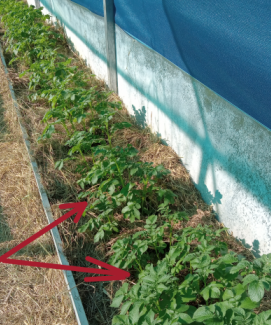
Here I collect the top 3 cms of soil, which is natural compost, from the surrounding semi-arid block we rent from the Government as free hold. In our area, which is subtropical by dry - it is a semi-arid area located near Emerald in Queensland. Not a good idea as the top soil contains dozens of weed seeds. Notice the white threads of fungi decomposing the organic matter (red arrows) - this is what composting means when humans help Mother Nature break down organic matter with human help. There are two main composting processes the hot method and the cold method. I do both - learned this from the Amish. I spade up the best organic matter composted from the bush block, and place this in my metal boxes for holding composted material. Never do that again. Better to make new soil from straw (grass cuttings) the flower/seed stalks, have most seeds fallen off. So you end up with grass straw,
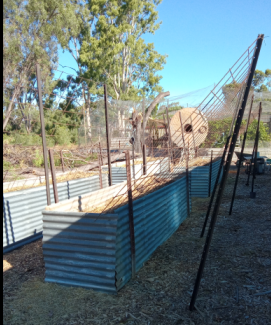
Like so. Notice the mesh is to vertically make the plants grow and contained Another Amish technique. Notice the metal boxes which allow for hot and cold composting processes are cheap, easy to build structures for holding large amounts of organic material for composting into soil. I place roofing sheet underneath on top of the natural soil to prevent tree roots from stealing you valuable composted soil you are making. The metal boxes are about 4m long and 1 m wide and 700mm high. They are held in place by 4 star pickets and wire. The organic matter will hopefully be ready for Spring sowinng of sweet potatoes, but for now I am trying snow peas. Imagine growing snow peas into straw that is cold composting into soil that is NOT soil yet? mad? Maybe - but its new bed making soil for the first time - so things are not perfect yet - the bed gets better over time. Within 2 months the straw mulch was broken down enough for the snow peas to grow reasonable, but the wild birds ate them : bother:( I have noticed the lumber jack birds eating my snow peas - not much left. Seems like I might have to place all the area under wire netting?
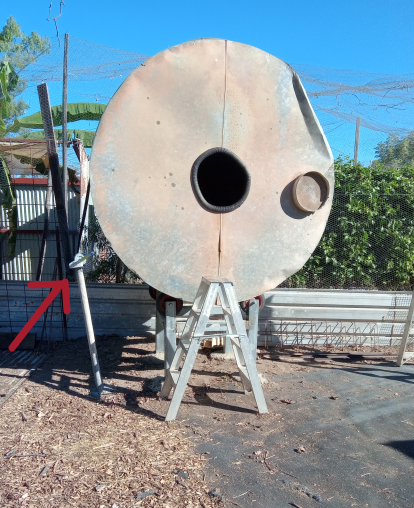
Here is a close up of the compost tumbler. Notice red arrow shows a hand winch which I had to purchase to help rotate the material inside - even though the material is around 100Kg it was hard to turn without a winch - now it's easy One problem with making compost is having greens available. I have plenty of browns, but not much greens. And the other problem is your material should be chopped fine - the smaller the faster the microbes can break it down.
Yes I learned this from a video. Leaves are water proof with wax to keep bugs out. And the lawnmower over the material cuts the leaves into tiny pieces, opening up spaces for the bugs to get in and digest your organic matter faster. But this lawnmowing the material costs money, fuel etc, to make faster decomposing material. So I use a variety of methods All methods have advantages and disadvantages. I use unchopped hot method if I have greens and browns in abundance, takes 3 months. I use unchopped cold method for starting potatoes new soil taking over 10 months to achieve. I use chopped hot method with greens and brown in the tumbler taking only 2 weeks to make light fluffy compost. I use chopped cold method to add mulch to the garden to cover it and allow worms to pull the material into the soil naturally. One can use browns or greens, but too much brown robs the soil for a while. Now when making compost; if you don't have greens, you can add urea instead. The ratio of browns to greens is about 3 to 1. Easy This should make a C to N ratio of 25 to 1. But in laymen terms if your mix is too rich in N, the material will rot smell and waste N. Especially if the N is mineral urea. If your mixture has not enough N, and too much C, your pile will stay cold rather than get hot. Smelly cold and wet normally means not enough air or you added to much water to the mixture. This tumbler makes turning the mixture daily a breeze. It takes me about 10 minutes to rotate the tumbler 720 degrees and make air again throughout. The tumbler sits on four 8" solid wheels with bearings, on posts welded and concreted into the ground high enough to allow a wheelbarow underneath. The wheels roll in the water tank ridges and helps keep the tank on track - not roll away on me off track. Do not expect the tank to last long - the compost will rust the tank out eventually. I also discovered my tank is too large, and the winch squeezes the tank rather than roll it. So it is better to use smaller amounts and roll it, or get a smaller tank. Ideal a 4 foot diameter. Mine is 8 feet in diameter. This is still far better than a commerical tumbler and much cheaper to build. The wheels I got off a recycle place, the winch cost $60, so the overall affect is great. I hope to be able to process 2000 litres of material every compost process. With lucerne greens planned, this will help one day.
Inside the veggie shed I have "grow pots" containing King Edward potatoes. The bags get buried in the straw - red arrows . The purpose of the straw is NOT as they say on other climate web pages I have read - to get more potatoes off the stolons along the stem. That is a possible secondary reason. The primary reason for placing fluffy straw all over your grow bags, and up the filling space of metal boxes, and all over your stems around the between them, is to keep them warm at night. We are already getting light frosts at night as we go into June (winter weather conditions). So the roots and tubers need all the insulation they can get. So far from 150 potato growing stems, around 300 stems, I might have lost 3 stems so far, from cold. I do not like "grow bags" because once buried under straw you have no way to knowing how to water them? The metal box method is better and cheaper. And since I am planning to do more potatoes, having metal boxes is a better idea. For my area in Emerald Queensland, the best time for potatoes is March to June. I started late from May to July and I am getting a few light frosts. This has affected the leaves burning them a little. I will have to make a rate proof curing / chitting room / as well as a seedling room.
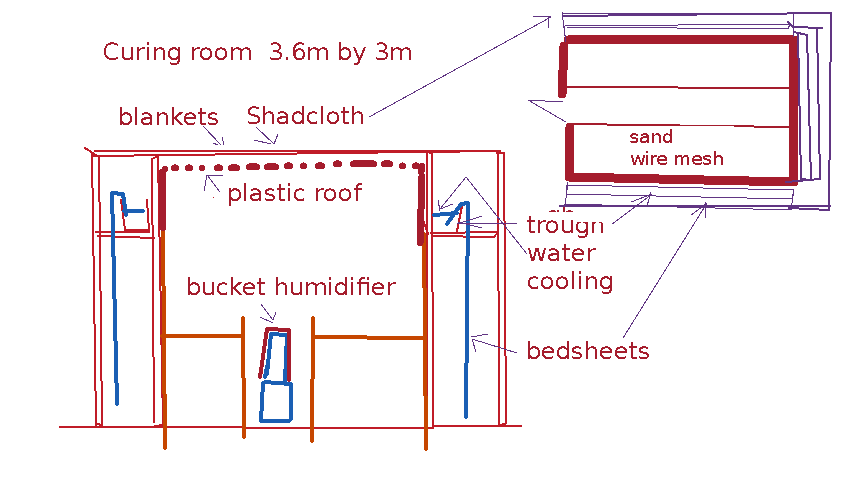
Length 3.6m Width=3.0 m Inside space is 1.2 m for wire mesh/shade cloth/sand table Than 600 aisle Inside space is 1.2 m for wire mesh/shade cloth/sand table That makes enough space for a 50 by 50 spud, over 3000 potatoes can be placed in the dry sand in the curing room or chitting room. Inside are buckets of water with towels hanging over a wire frame to draw up water and evaporate making a natural humidifier. Blankets cover the roof to block light for curing. Remove the blanket for chitting. The trough and bed sheets drip water and cool using evaporation process, The shadecloth keeps the wind controlled a little to assist in cooling. The clear plastic roofing keeps water and heat out. The floor is metal roof sheets with star pickets going through the flooring This makes the floor and sides rat proof. Add metal flashing if required, An oven door completes a water proof door with seals. Inside the room needs to be 20 to 30 degrees, and in winter this is fine. I expect at night maybe getting down to 5 to 10 degrees? The humidity needs to be 80 - 90%. This is achieved by buckets of water inside. A cheap tempterature humidity meter keeps things OK. In an area of dry desert weather (humidity less than 40%) this is the only means I know to do these things. In chitting a Chinese man dips the spuds into milk and buries them eyes up into sand with 80 - 90% humidity over them. This should work OK - light at one end. I am trying to learn simple consistent techniques. This way I can cure 3000 spuds, or chit 300 spuds no problem all at once. I can also use the room to make seedlings too. I need to make 300 corn seedling in their own tubes, ready to plant out all at once. You cannot stagger corn seedling, they talk to another, so its best to make them all the same age, and plant them in a single batch of 300 corn plants, enough for a couple for a entire year.
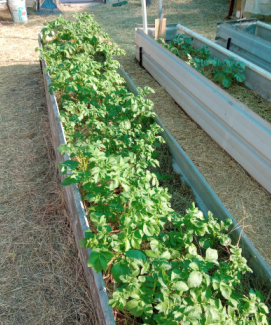
King Edwards growing in metal boxes. I think this is easier and cheaper than using "grow bags". This metal box is half high (300mm) I reckon next year I will plan metal boxes full high (760mm) and place the tuber on the bottom in 200mm virgin composted soil, and hill up the stems as they grow to a height of 300 mm, with fluffy straw. This will insulate the stems from cold and maybe promote more tubers? I have learned contary to video opinions, you do not get extra spuds up the stems. Burying the first 100 mm is enough. Perhaps using well rotted straw might be better and help fertilize the stem around the straw? At the moment, the potatoes only have 300 mm thick of straw to insulate from cold. Now if it rains too much - you will have to cover the potates from rain, as the straw once wet makes the stems too cold and they will get fungus rot and feel cold. Next year I plan to cover the potatoes every night with roofing from rain and cold. The bed needs to be fluffy airy warm and dry. I think I need plastic roofing on hand all the time in case it rains and at night to protect from frost and keep the day's heat in.
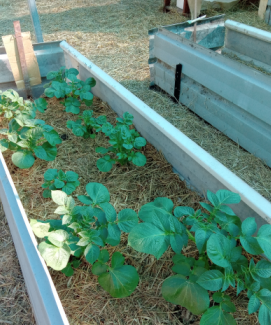
Sebago potatoes growing in metal boxes They have darker broader leaves and are growing well. They have thicker leaves and stems so seem more robust than the King Edwards. Sebago also flower while the King Edwards don't flower. Plan to grow more Sebago next year.
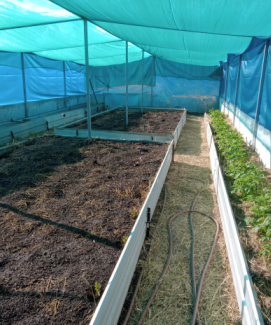
A view of the big mulched areas breaking down into soil in time. These beds are for corn coming in September. To the right is the row of King Edwards. Making and getting compost is hard especially in a dry arid zone like I live in outback Queensland. I grow the potatoes between May and August - through the winter time. A better time is March to June - avoiding frosty nights. This is different to USA growing so anything of advice is no good for my local area. I cannot get potatoes to sprout - it is too cold already and far to dry in my area, so I plant them as they are in the ground. This takes just as long as pre-sprouting them - so nothing is gained? Try to avoid frost - temperatures range from 4 degrees to 28 degrees C. Keeping things simple - that means insulating them with straw. If you had lots of bricks around you place them up against a brick wall and get the heat off the wall at night. Making a fire is too much effort and wood consumption. Making a hot compost - hmm? might try this one day. Placing plastic covering over at night and straw between seems the simplest methods so far? Getting ready for next year with metal boxes breaking down organic matter over 12 months using the cold compost method.
|
Created by Rob Thompson. Hosted since 10/01/2012. Visitors HOSTED by Prologic, my Son. A thin website.